
I promised I'd show you our photobooth which Mr. B and I produced with 3 days until our wedding. I thought it had fallen off our to-do list, but after a trip to Home Depot and a suggestion from his stepfather, it was brought to life.
Like many before me, the inspiration started with this Sasha Souza creation:

After brainstorming a way to make ours light and without stands, we bought large sheet of this styrafoam. I'm not sure what it's really used for but it worked for us.


I found some fabric I liked and spray glued it to the foam board.

We used Elmers spray glue and let it sit for 10 mins.
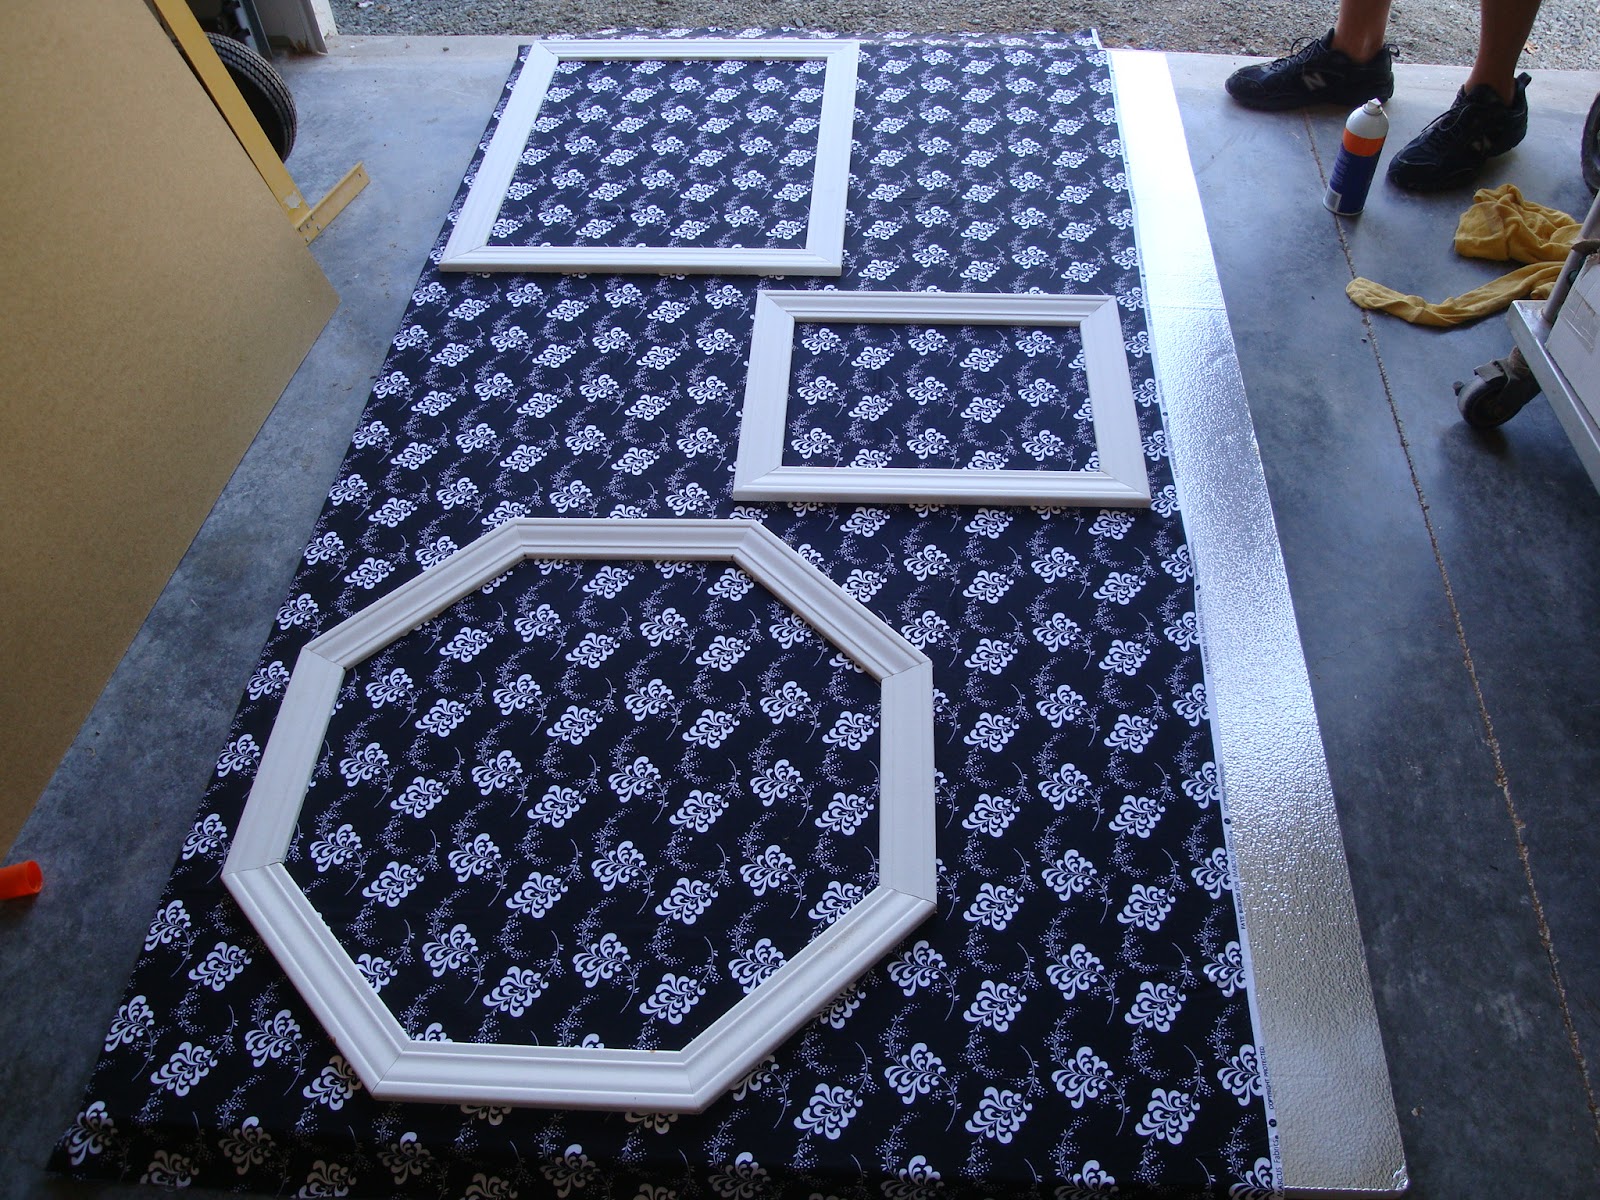
Mr. B and stepfather, Gary, made these frames the previous day from scrap moulding. We played with the placement until we were happy.

He used a box cutter to cut the fabric along the outside of the frame. This way, the frame could be glued to the board and not the fabric.

He peeled the cut fabric off the board and put it aside.


The frame was glued to the board.

He repeated the process for the remaining frames and used the discarded material to cover the bottom of the board.
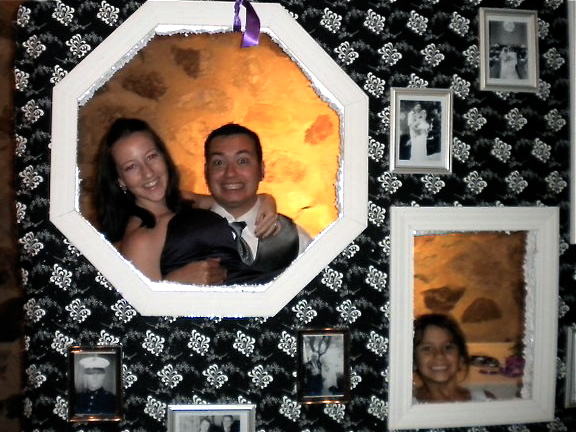
Next, it was my turn. I printed out the following photos on our computer and framed them in silver.

All are wedding photos from family members, except Mr. B's USMC photo that I just thought was so handsome I had to add.
Mr. B waited until the day of the wedding to cut out the foam in the frames and glue the photos to the board. I didn't see the finished product until it was hanging in the courtyard during our reception.


Ok, so a few notes:
1.You may notice that the horizontal square is broken. "Someone" thought the board was more sturdy and tried to put weight on it, ending with that person lying flat on their back on the ground below and the photobooth slightly broken.
2. If you are going to hang your booth, hang it lower than you think. The space in the frames is largely unused because it was hanging too high for most guests. Also have a set plan for hanging. Without a plan, we ended up looping ribbon from the frames.
3. Don't hang the booth in front of strong light. I haven't seen the pro shots of this yet, but I imagine ours would have looked better if it was hanging in front of an un-lit wall.
4. Don't wait until the day-of to cut out the holes. White foam was everywhere, but because it was done last minute, we hadn't prepared for that. If you are the type of person who likes things perfect, don't let anyone touch, hang, or cut your board without your supervision.
In the end, I was super happy we had the photobooth and it added another fun element to the reception. While crafting it at the last minute did present its own set of problems, I'm sure if you take the time to plan it out, you can really nail this super easy project!
No comments:
Post a Comment
Feel free to comment here, or head over to Weddingbee.com to add to the discussion there!